

How To Clean Up Old Half Toned Comics In Adobe
Full photo restoration tin can exist time-consuming, simply it can likewise be extremely rewarding.
If y'all're looking for restoration how-to's, your search is over! In this tutorial, we'll walk you through the process of erstwhile photo restoration using Adobe Photoshop. Even if you lot're a beginner, these steps volition aid yous raise images without breaking a sweat.
But just in example yous're pressed for fourth dimension (or if you desire an expert touch), you can besides go out it to pro editors. Head over to our lodge folio at present to make an inquiry! Our skilled team will colorize and restore old vintage photos and bring them dorsum to life.

Photoshop Tools For Restoring Old Photos
Before we get into the tutorial, it's best to familiarize yourself with the tools y'all can employ on Photoshop CC. You can activate these tools by clicking their icons on the toolbox window. If you need a visual, yous can check out a YouTube video or ii to help yous out!
Keep in heed that your toolbox window will differ depending on what mode you lot're using. Switch to the Expert style to encounter all the available tools you can employ for the photo restoration process.
Hither are some tools y'all'll be using:
- Clone Stamp: The clone tool paints an paradigm using a sample. It can be used to duplicate objects and remove imperfections or marks.
- Spot healing brush: This is designed to remove spots and unwanted objects, like to the patch tool.
- Smart brush tool: This creates tonal and hue adjustments to specific parts of a photo. This is useful for removing scratches and other types of impairment.
- Elliptical marquee: This selects an surface area in your paradigm in a round shape.
- Burn tool: This darkens areas of a sure image to bring out details.
Photoshop: Old Photo Restoration Tutorial
The best part of using Adobe Photoshop for one-time photo restoration is that it preserves the original image. Yous can make all the enhancements on your computer, and then share them on social media without touching the physical photo. Yous can too print the photographs as many times as you similar.
Here are the basic steps for how to restore an erstwhile photograph:
Step ane: Scan The Epitome
Step 1 is to gather old photos that need enhancement. You can first with family unit photos that accept tears, scratches, or faded colors. You lot can even choose to colorize black and white images.
Once you've gathered all the pictures you want to restore, scan the images. Read here to larn on the best format to scan photos. You can visit a local service provider in case yous don't take a scanner at abode. You may also take a picture of the photograph with a high-definition photographic camera, but scanned images will always have college quality.
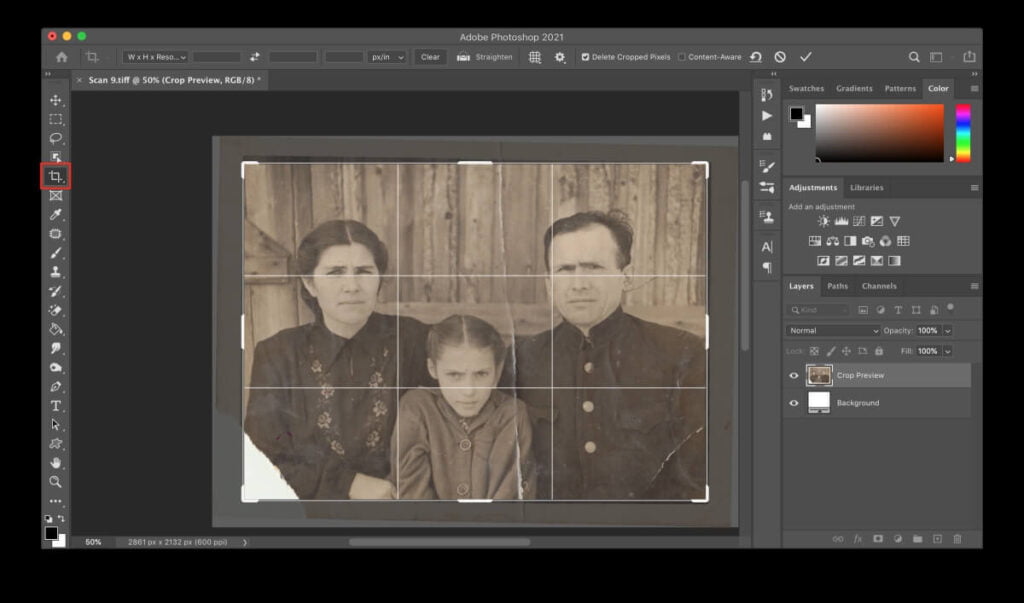
Footstep 2: Prepare And Crop The Image
Once you take a scanned copy of the quondam photos, open the digital file on Adobe Photoshop. You may need to practice a bit of paradigm rotation earlier starting.
So, use the ingather tool in Photoshop to cut the prototype to the size y'all demand it to be. Make sure to ready the resolution to at least 300dpi, so that the paradigm volition have the exact length and width you want in one case you decide to reprint the photo.
If the resolution is lower than 300, then the image size volition be smaller once reprinted. If the resolution is higher than that, then the image size will be bigger.
It's best to go with standard photo print sizes and then that you lot won't have trouble looking for a picture frame for your photos later on.
Here are some of the sizes you can cull from:
- 4 x 6
- 5 x 7
- viii x ten
- 10 x thirteen
- ten ten 20
- 11 ten 14
- 16 x 20
- 18 x 24
- 20 10 24
- 20 10 30
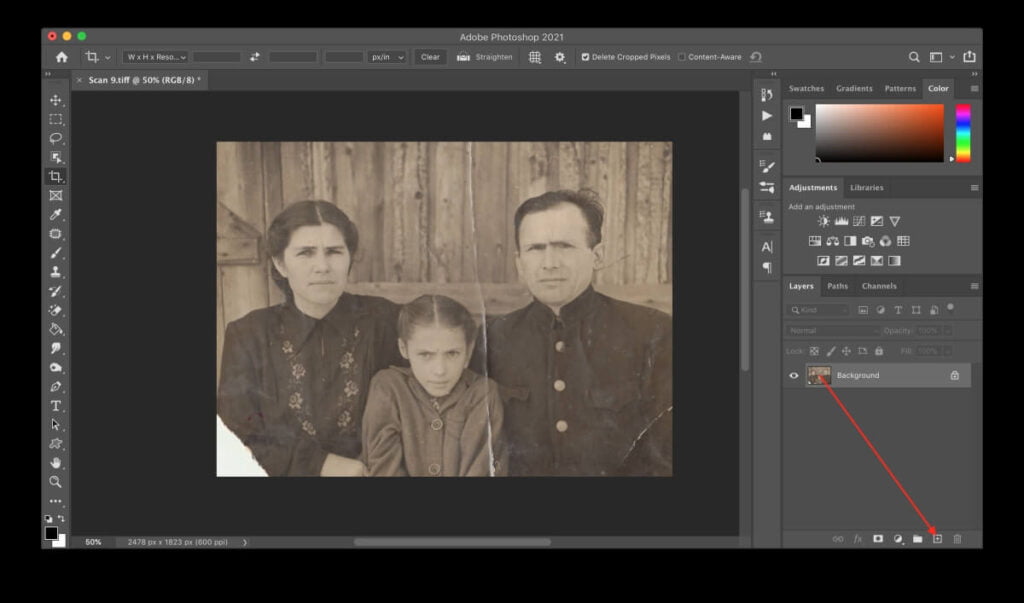
Step three: Create A New Layer
When you open up an image on Photoshop, the original file will exist on what'south called the "Background" layer. Information technology'south best not to edit the Background layer directly so that you tin revert changes or check the original prototype after making adjustments. Instead, create a new layer on top of it and work on that.
Look for the layers panel on Photoshop. Elevate the Groundwork layer to the re-create layer icon at the bottom and rename it. Once you're done, you can hide the background layer by clicking on the "eye" icon.
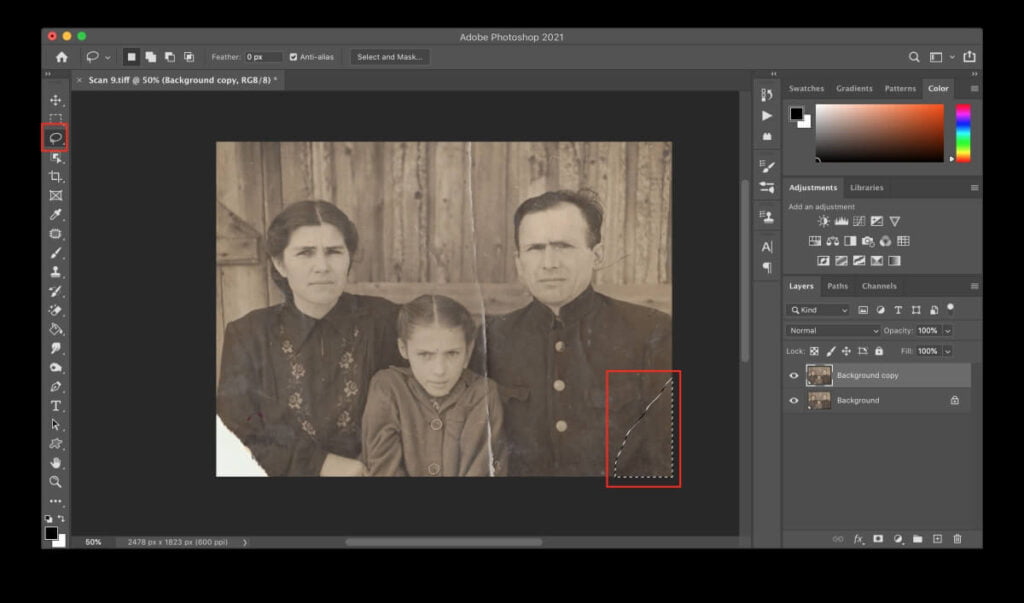
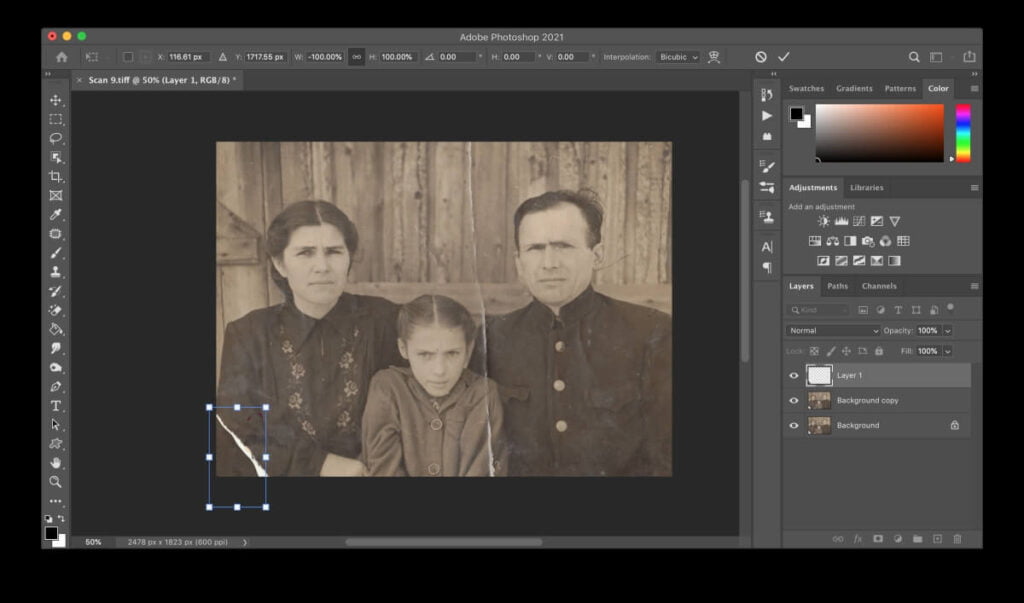
Step four: Repair Tears And Other Damage
If your photo is torn into different pieces, don't worry. Y'all can easily patch these photos in Photoshop.
Utilize the lasso tool to select each slice and copy-paste them into separate layers. Then, put the pieces together. Create a new layer and apply the Clone Postage tool to comprehend any parts that are missing.

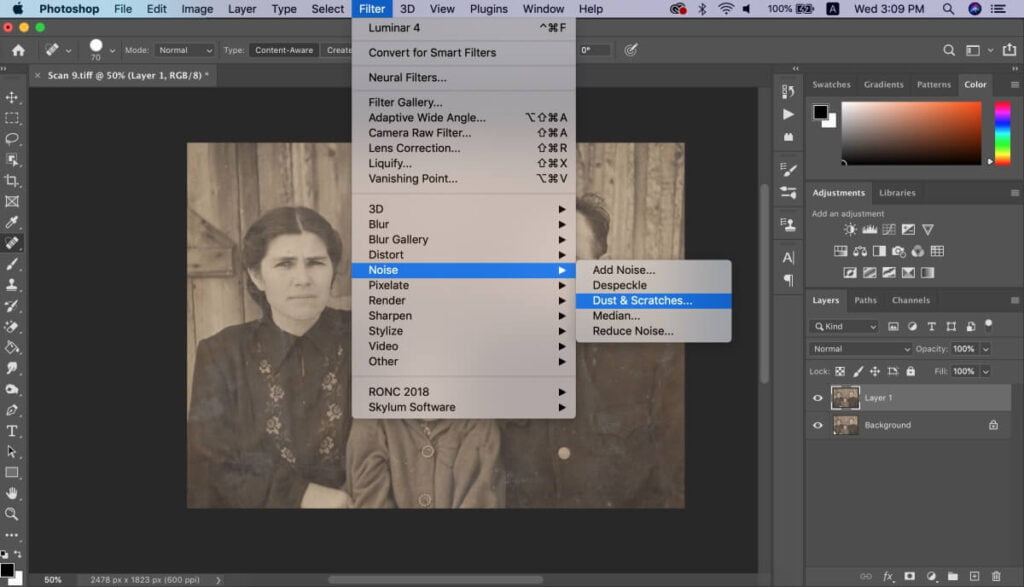
Step 5: Remove Dust And Scratches
Cleaning up the image is the simplest mode to restore old and damaged photos. On the Filter pane on the taskbar, you'll observe the Noise Pick. Under this, click on Dust & Scratches.
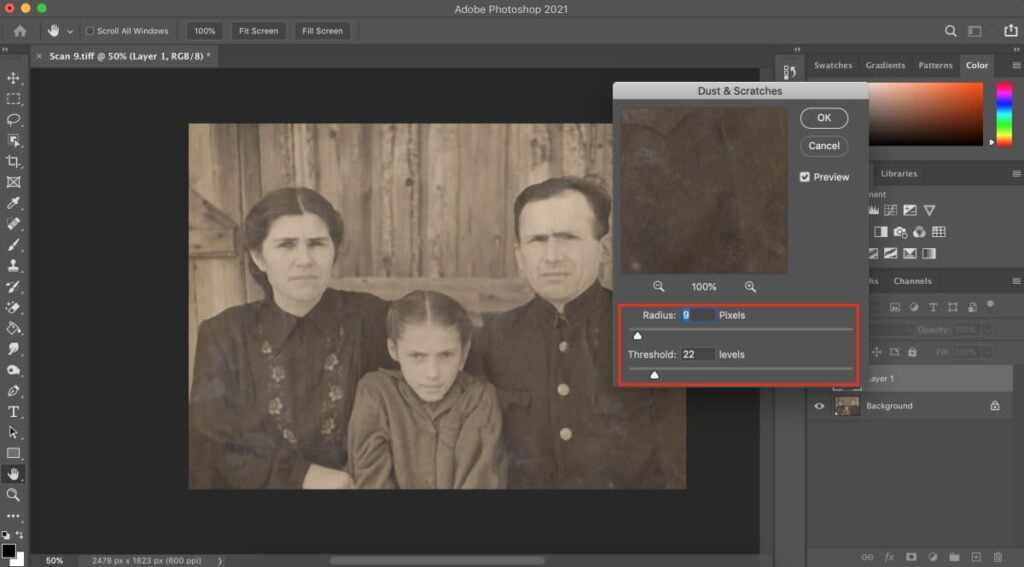
Next, open a popular-up window and increase the Radius and Threshold levels. Make adjustments until the photo looks cleaner.
If there are yet several defects left, create a new layer and use the spot healing brush to pigment over the remaining flaws.
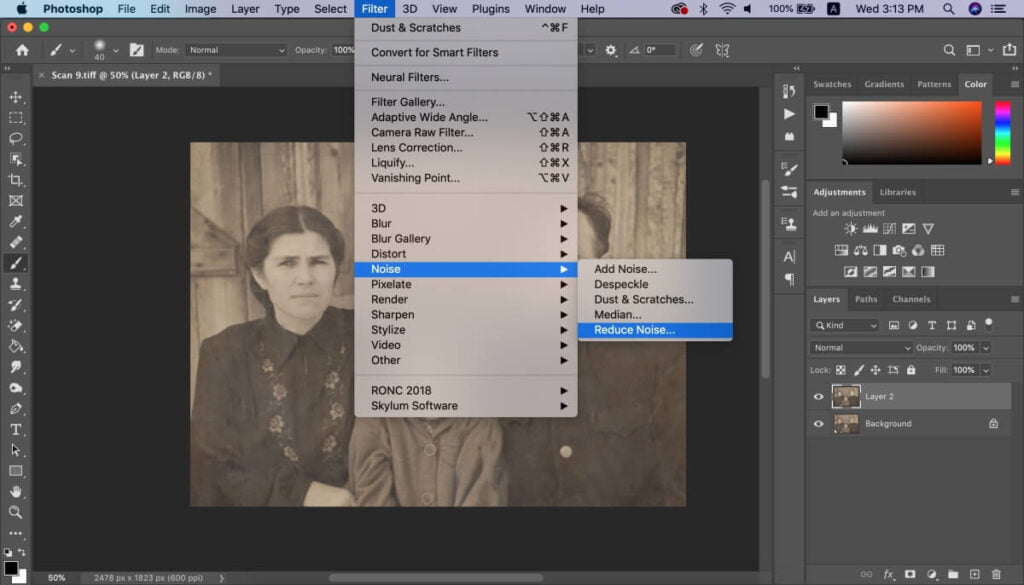
Step vi: Do A Fleck Of Noise Reduction
Dissonance refers to grainy details in photographs that obscure details. With Photoshop, you lot can easily correct these flaws and sharpen the image.
On the Filter console, y'all should see the Noise Reduction tool to adjust and remove noise. Don't overuse the tool to avoid making the image expect unnatural!
Brand sure to zoom in and out to check for any missing details.

Footstep 7: Meliorate Tone And Vibrancy
To restore faded color photos in Photoshop, you lot only demand to do some simple color corrections. In the Adjustments tab on your taskbar, you should see 3 options:
- Auto tone
- Machine contrast
- Auto color
These automatic tools may give y'all the effect you demand without having to manually adjust contrast and levels yourself.

Step viii: Practise Some Color Correction
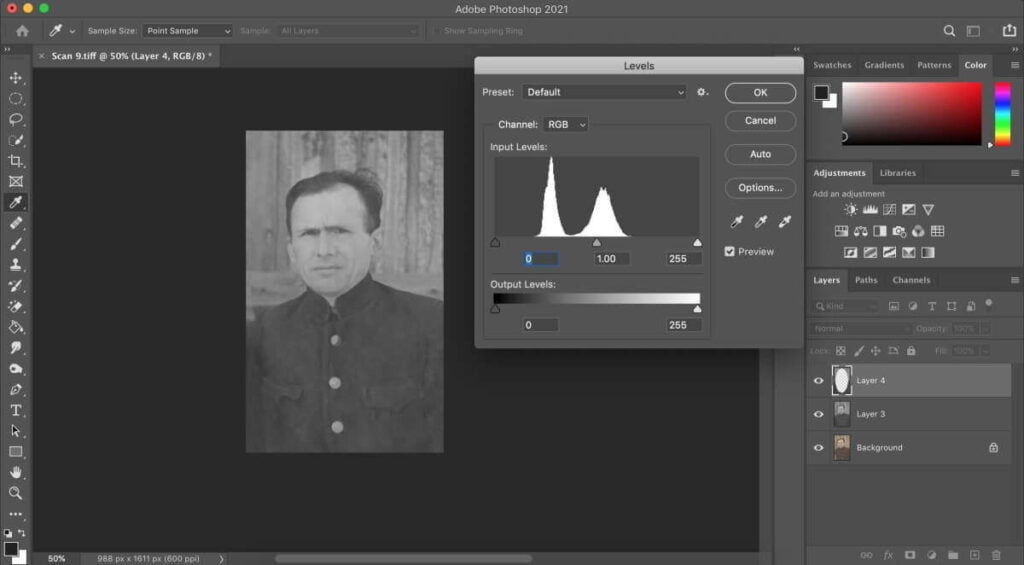
If y'all want to enhance and restore an old photograph further, try adjusting the levels. This color correction technique is useful if your epitome is too yellowish, which is mutual for old photographs.
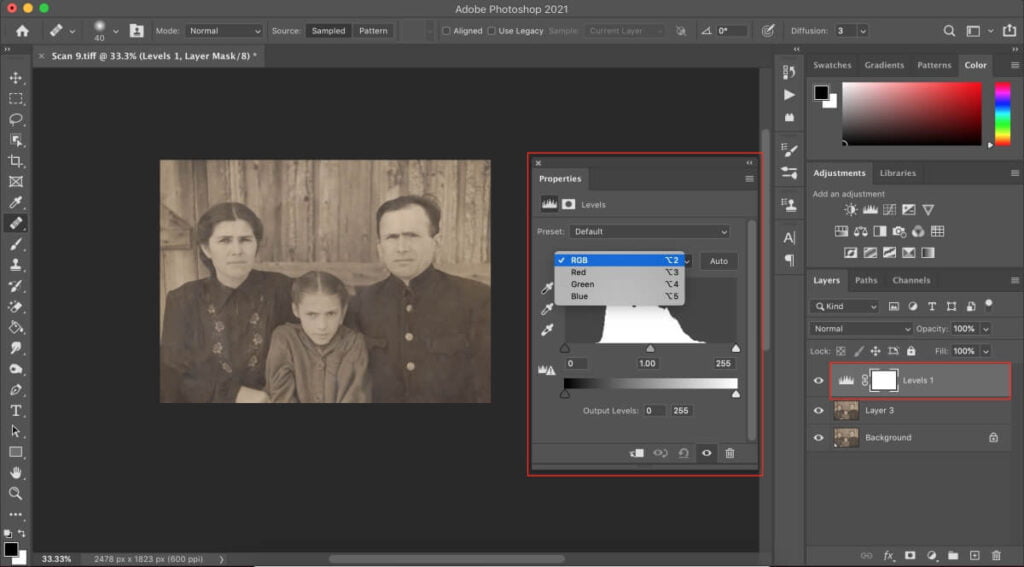
Start by selecting the levels adjustment tool beneath the layer. You should also see it appear in your Photoshop panels.
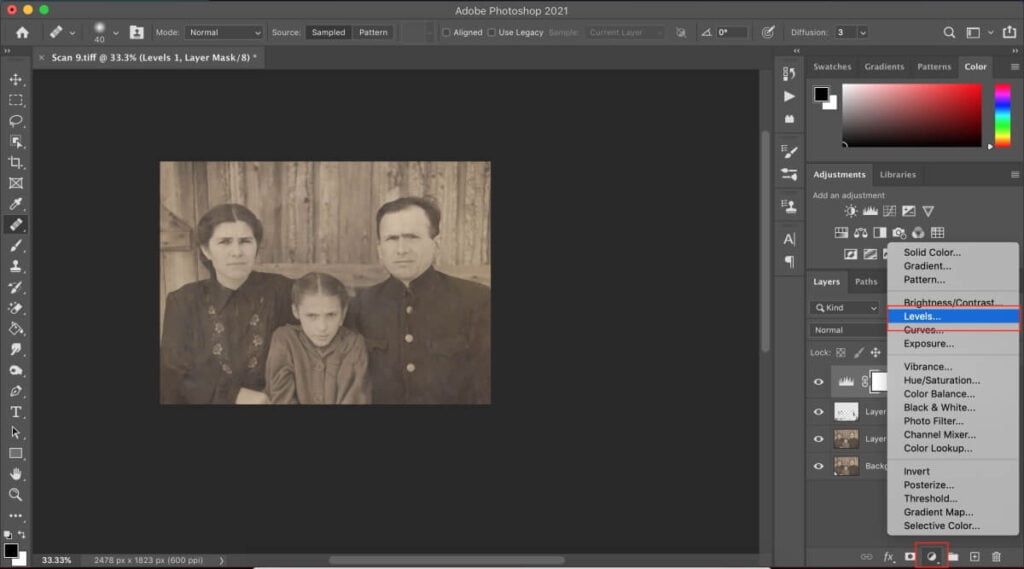
Click the RGB icon and it will show the ruby-red, green, and bluish channels to choose from. This volition help you remove the color cast of the epitome yous're working with.
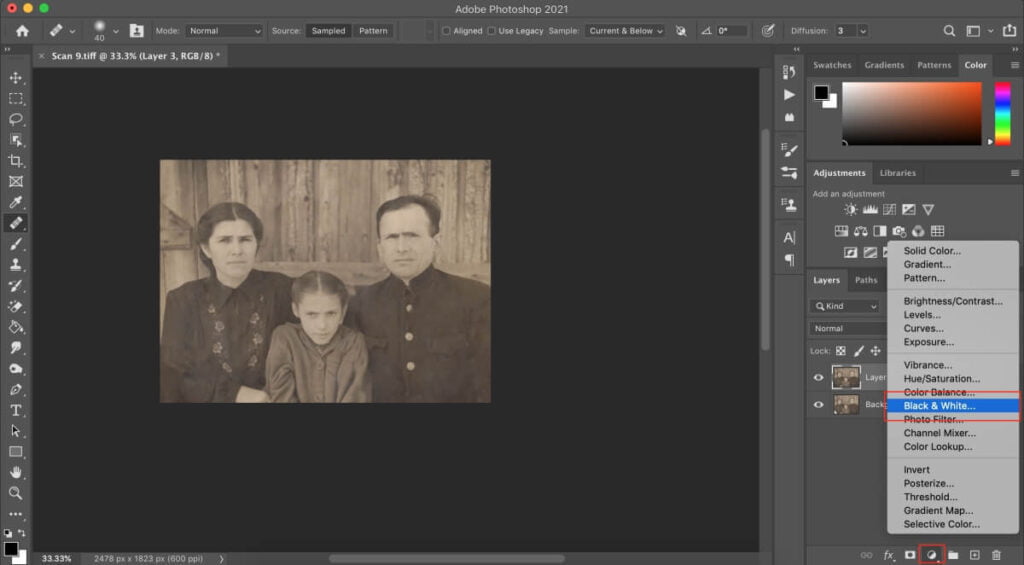
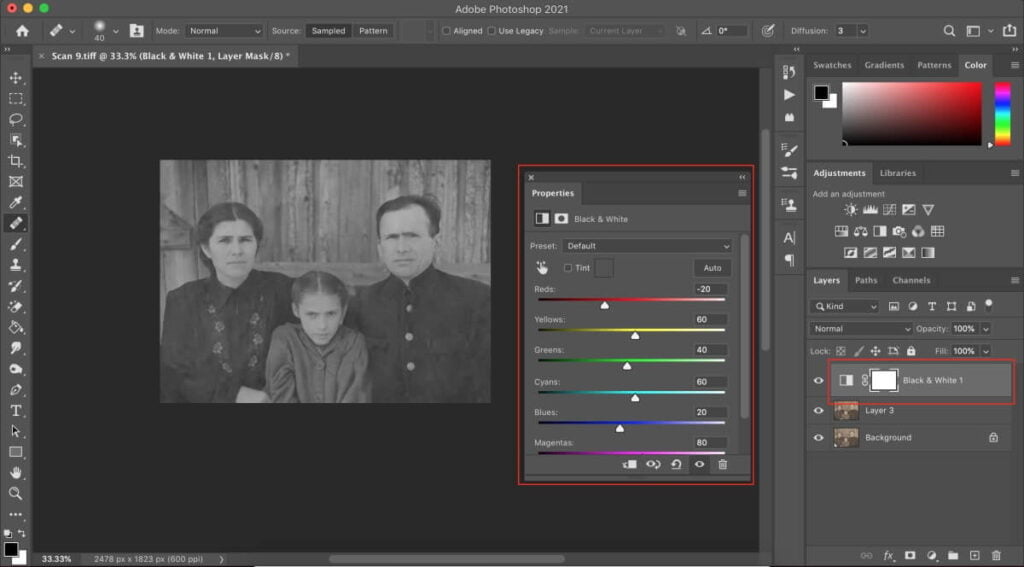
If the photo is in sepia, add a black and white adjustment layer.
Step 9: Colorize The Image
Colorizing is optional, only information technology'south one of the all-time ways you can heighten an image using Photoshop.
There are several techniques yous can use to achieve this task. Feel free to choose amid the following:
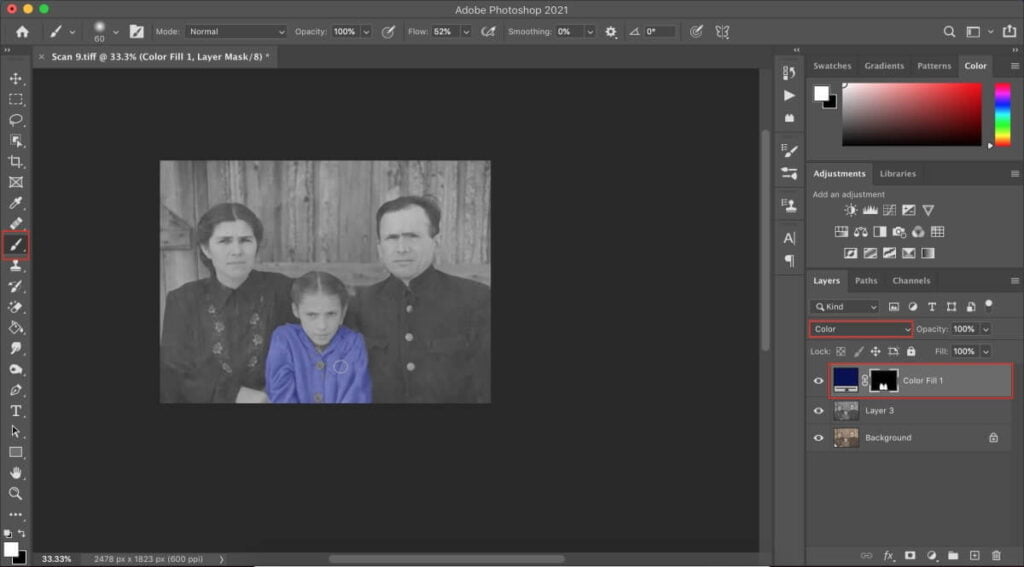
Utilize A Brush With Solid Color Adjustment Layers
This technique is quite similar to painting over an actual photo. Add a solid color adjustment layer for every office of the photograph yous want to paint, then change the blending manner to Color so the details of the original image remain visible.
Utilize a castor to pigment over the part of the image you want to colorize. Change to a tinier brush size if yous're painting pocket-size areas. Don't forget to add a separate layer for each aspect of the photo y'all're painting, and then you can easily delete or brand adjustments!
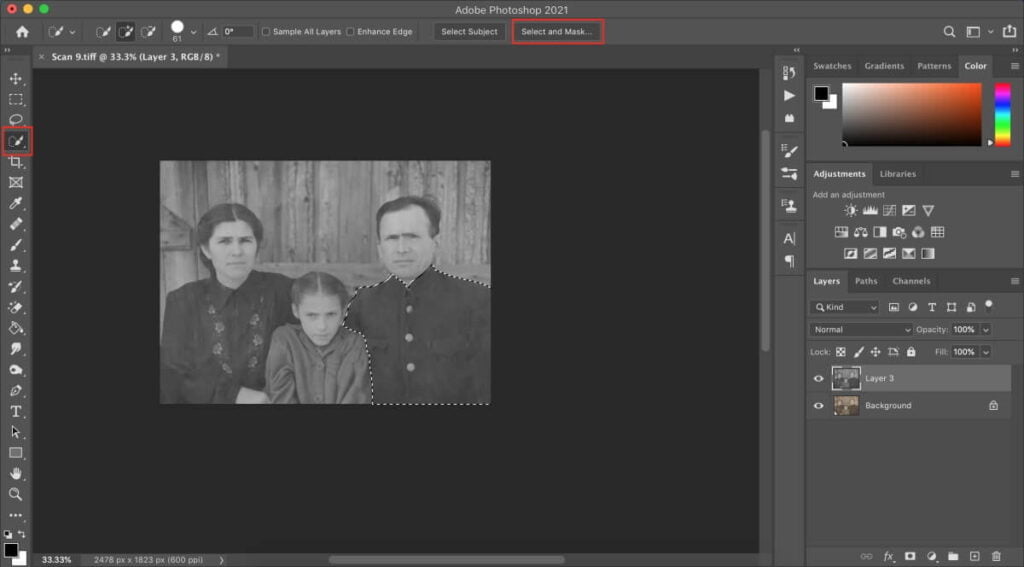
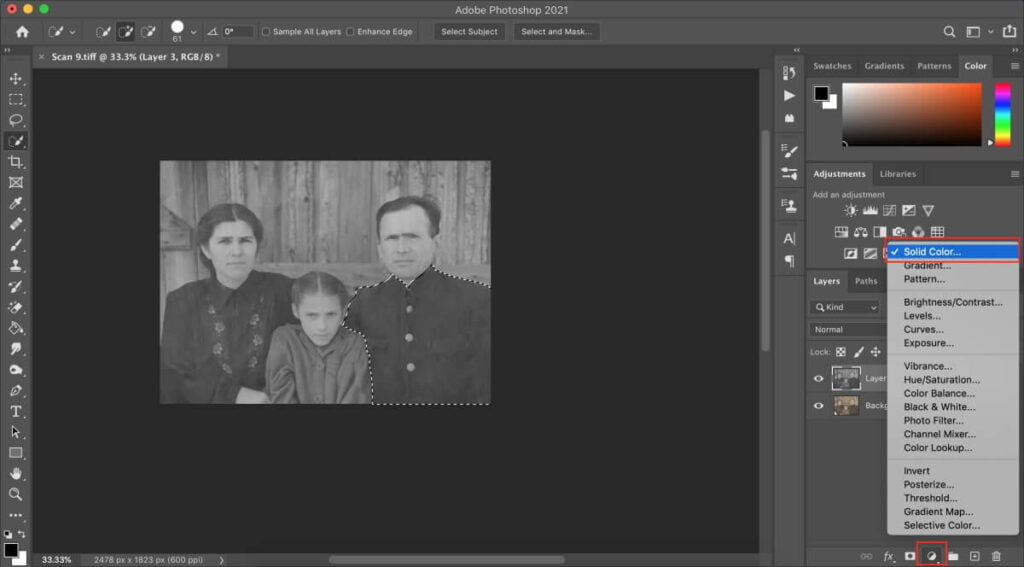
Use The Quick Selection Tool With Solid Color Layers
Same with other techniques, yous'll demand to create a new layer to colorize photos using this method. Then, employ the Quick Selection tool to outline areas y'all desire to fill up. Afterward, you tin can use the Refine Edge push to make sure you've selected the right areas.
One time you've selected the expanse you want to fill, add a solid color fill layer with the blend style to Color. Then, add fill in the areas to your liking.
Ane tip for this method is using the Quick Mask mode to remove areas you don't want to pigment. This is useful for small details similar eyes.
Use Curve Adjustment Layers
The virtually unproblematic method is by adding a Curve adjustment layer. Pick the shade you want on the pop-up window for curve aligning and so use the brush to pigment.
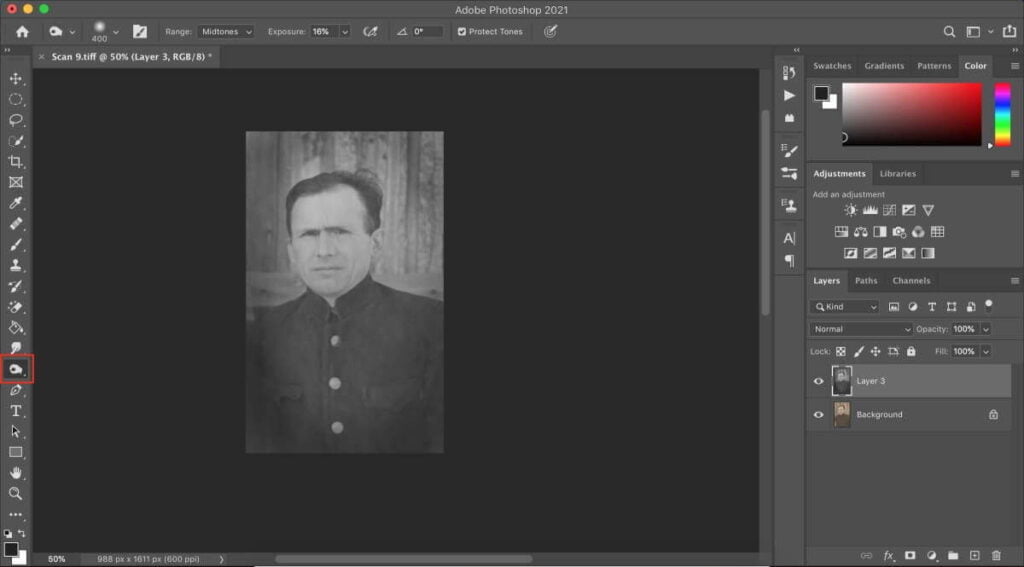
Stride 10: Add A Vignette
Adding a vignette darkens the borders of the paradigm, allowing the subject to shine and become the center of attending.
To create a vignette, use the elliptical marquee tool at about 200 px size. Then, select the subject and then choose Select > Invert choice. This will allow you to highlight everything effectually the subject field.


Finally, create a new layer using your selection. Then, suit this layer'south levels by choosing cmd+L. You lot can too utilise the Burn tool to darken this portion of your image.
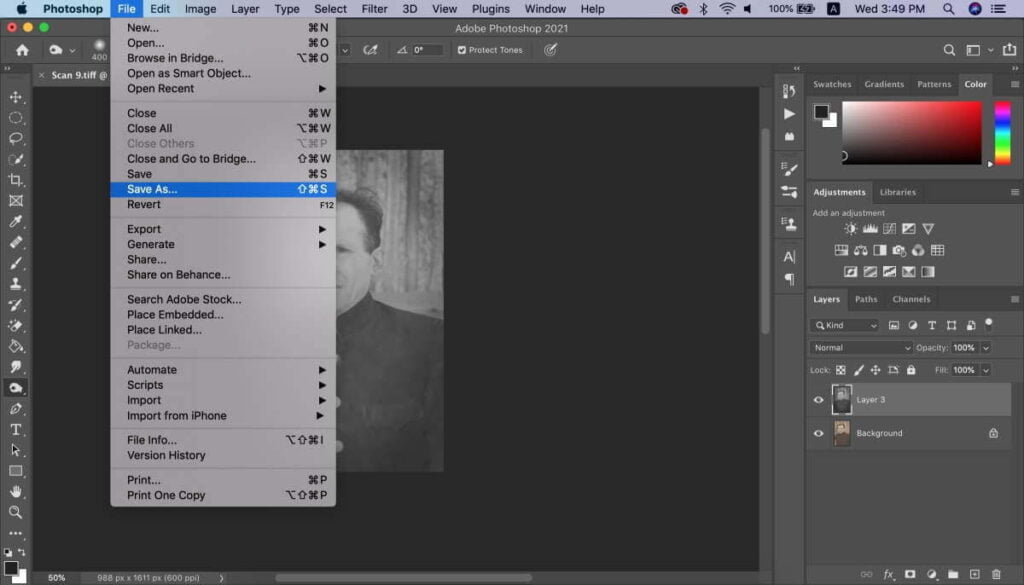
Step xi: Save The Image
Once you lot're satisfied with your piece of work, save the prototype.
Note that saving in an paradigm format like .jpg and .png will merge layers. You can salve a divide .PSD file so that yous tin can make additional edits afterward if yous wish to.
Tips For Old Photo Restoration In Photoshop
Before yous begin to restore damaged photos following the steps from our tutorial, read the tips below. They'll help make the process easier and simpler.
Utilise A Graphics Tablet
If you want to restore old photos regularly, it might be a good thought to invest in a graphics tablet to utilize with your photo editing laptop. This will give you more control every bit you're painting over the images.
Use Keyboard Shortcuts
Learning how to use keyboard shortcuts tin cut your working fourth dimension significantly. As you lot Photoshop old family photos, keyboard shortcuts will easily allow you to alter the Blend Mode of the painting tool.
Don't Only Go With Your Gut
If you're restoring historical photographs, it's all-time to research rather than but going with your gut. For example, you can cheque other images to run into what colors public figures used to habiliment.
Don't Just Go With Your Gut
Painting over photos of people tin can be tough, but you don't accept to rely on your imagination. Cheque other photos to go a clue on how the final issue is supposed to await.
For instance, when you're painting over skin, you lot might take to add different undertones like pink, blue, or yellow. Try looking for a reference photograph of a person that would have a similar skin tone then replicate the await.
Hire A Pro To Restore Old Photos Now
Photo editing isn't a unproblematic task, simply you tin acquire how to do it by post-obit the steps in our tutorial. With consistent practice, you can make an sometime photo look like information technology was taken yesterday.
Still, yous don't have to do all the work yourself. If you're looking for a photo restoration service, Epitome Restoration Centre should exist your top pick. Our pro editors will restore sometime family photos at highly reasonable rates.
The all-time part is that the entire process can be washed online. Why go through all the trouble of looking for local shops when you can just ship us an online request and take the restored photo right to your door? It's that like shooting fish in a barrel and convenient!

Source: https://imagerestorationcenter.com/photoshop-old-photo-restoration/
Posted by: mumfordramie1935.blogspot.com
0 Response to "How To Clean Up Old Half Toned Comics In Adobe"
Post a Comment